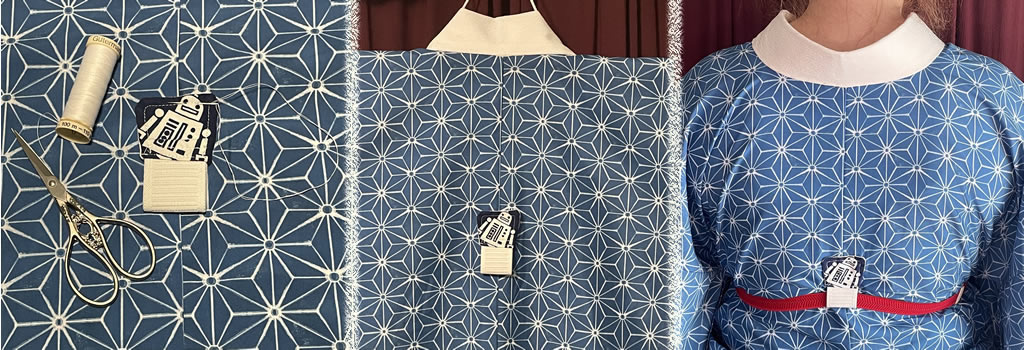
There are many kitsuke tools utilized to wear kimono; for a beautiful exposed neckline, you may wish to utilize an emon-nuki (衣紋抜き)!
When dressing, you will pull the back seam down to open a preferred space at the nape called emon (a phrase in Japanese used to explain this is “emon-wo-nuku”). This kitsuke tool is effective in keeping your collar in an ideal shape. It is sewn on the outside of your juban in the back and a himo or korin-belt can be threaded through the loop to keep the collar in place. No more collar creeping up!
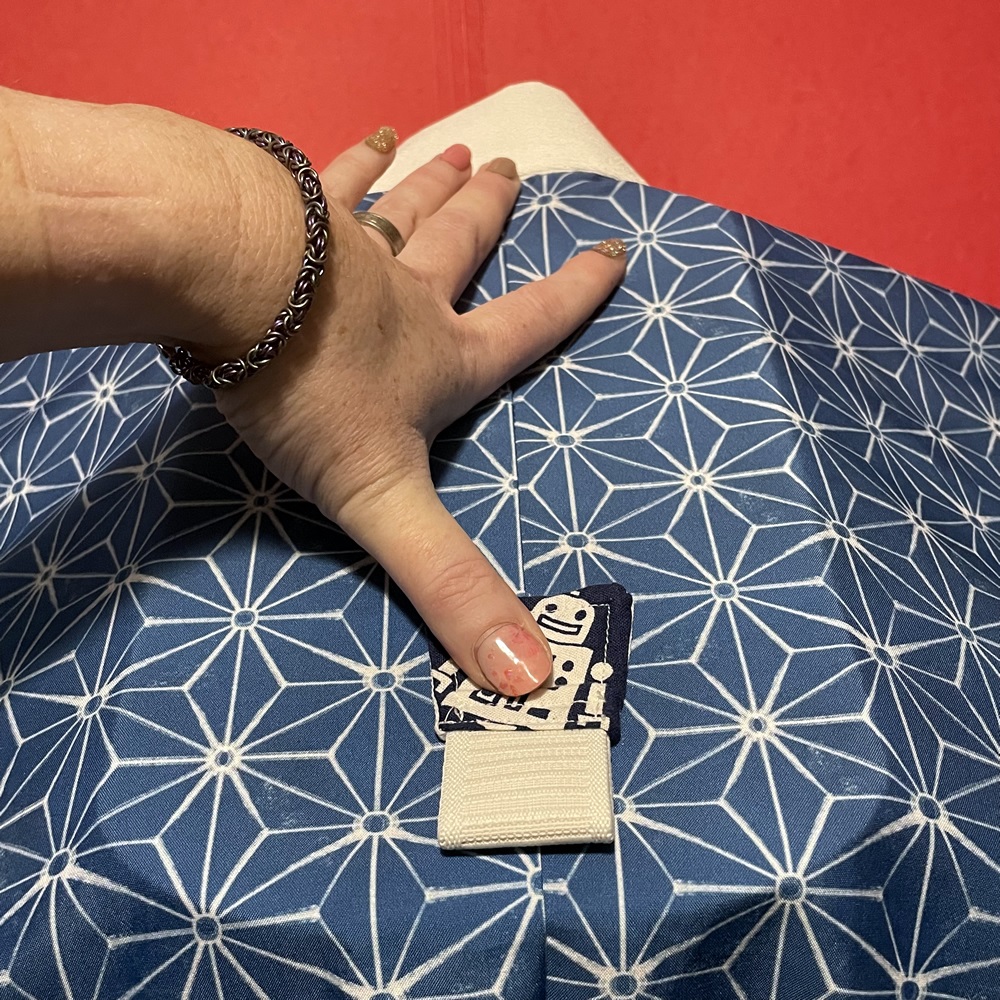
There are many ways to determine where to place the emon-nuki. I have seen people say to sew it 4-5 in (10-13 cm), 5-5.5 in (13-14 cm), or 6-7 in (15-18 cm) from the collar. However, I have found the method I learned from my kitsuke teacher works the best for me. Human body ratios are amazing and very useful when balancing the placement of tools and accessories with your particular body! In this case, we will be using your hand as a measuring device! Specifically, the distance between your middle finger and thumb.
Open your hand wide and place your middle finger at the intersection of the center back seam (sen) and the collar (eri), then place your thumb on the center back seam.
This is where you will place the top of the elastic loop on the emon-nuki.
Kimono Kitsune (brand) emon-nuki are easy to place, as you can easily feel where the elastic ends inside the emon-nuki.
Make sure it’s centered, then pin it to your juban to keep it in place.
Now it’s ready to sew on! I use double thread and basting stitches (mine are on the small side, around 0.125-0.25 in / 3.175-6.35 mm). There are many ways to sew the emon-nuki on your juban. I follow the border in a small trapezoid (following the machine stitching), but you can also sew a box with an X from each corner (☒), or simply sew three horizontal lines (≡).
With the sewing complete, try it on to make sure the placement works for you. You can always easily remove it and adjust the placement up or down if you need to make adjustments.
Emon-nuki are just one of the dressing tools that can be used when you learn to wear kimono. Check our Tips & Tricks portion of our Blog for more information on kitsuke tools, kimono terminology, and other helpful tricks for your kimono-wearing journey.